


How to Clean Hair Out of a Drain
Even if you use a drain stopper in your drain, enough hair could eventually slip into your drain to slow it down. To get your drain flowing again properly, either break up hair clumps enough that they’ll pass through the drain or pull all the hair out of the drain manually.

If your shower, tub, or bathroom drains aren’t draining effectively, then hair is the most likely culprit. The minute you notice slow draining, try one of the following methods. Chances are, you’ll clean out the hair and solve the problem fast. And don’t worry: we laid out the tools you’ll need to keep from actually touching the nasty stuff yourself.
Alternate baking soda and vinegar and plunging

You’ll need some grease-fighting dish soap, a cup of vinegar, a cup of baking soda, the means to boil water, and a cup plunger. First, squirt some dish soap down the drain. Chase that dish soap with the cup of baking soda. Make sure the baking soda actually gets down the drain. Pour the cup of vinegar down immediately afterward. This should create a chemical reaction that causes fizzing in your drain.
After the fizzing dies down, wait five minutes and boil some water. When the water’s boiling, pour it slowly down the drain. The fizzing baking soda and vinegar help break up the hair and the water helps it pass through the drain. Now you should start plunging. Run some water down the drain and plunge using your cup plunger as if you were trying to remove a typical clog. If your hair clog is particularly stubborn, you may have to repeat this process a few times.
Remove the drain stopper and use tweezers
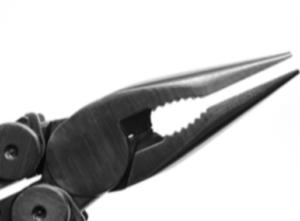
Plunging the drain is certainly less gross, but unfortunately pulling the hair out will probably be more effective. You’ll need a screwdriver, rubber gloves, a flashlight, and needle-nose pliers. First, remove the drain stopper. You might be able to pry your stopper off right away, but chances are you’ll need your screwdriver. Take this opportunity to clean off the drain stopper in your sink. Just make sure any hair in the stopper doesn’t fall into another drain!
After removing the stopper, you should have a clear opening to the drain below. Shine the flashlight into the drain and you’ll probably see a gross clump of hair. Put on your gloves and use your needle-nose pliers to reach in and grab the hair. If your pliers can’t reach or fit, you could also try making a makeshift snake out of a hanger. After removing the hair, run some hot water down the drain before replacing the stopper to make sure everything’s working properly.
Use a Zip-it tool
A zip-it tool is a long, flexible, and barbed stick of plastic designed to clear drains. They’re quite inexpensive, reusable or disposable, and available at most Tampa hardware stores. To use a zip-it tool, you simply insert the barbed length down into your drain. As you pull the zip-it back out, the barbs will catch any hair in the drain back out with it. Zip-its are flexible enough to fit through most drain stoppers, but we recommend removing the stopper anyway.
For best results, try twisting or contorting the zip-it tool this way and that as you insert and pull it out. As always, follow up your initial cleaning with a hot water rinse. In fact, you may want to follow the baking soda and vinegar steps above after using a zip-it tool. Consider buying a few zip-it tools to keep on hand in your bathroom. That way, you’ll be prepared next time you need to remove hair clumps.
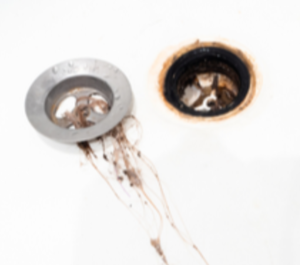
Remove the whole drain
You’ll need a flat-head screwdriver, plug wrench, adjustable wrench, locking needle-nose pliers, standard pliers and gloves. This process is a bit more involved than the other tips listed here, so we’ll run you through it step by step:
- Remove the stopper.
- Insert the plug wrench into the drain opening and fit it into the crossbars of the drain.
- Grip the plug wrench with your wrench or pliers and turn counterclockwise to loosen the drain from the threading.
- When the drain is loosened, remove the plug wrench and insert the needle-nose pliers.
- Lock the needle-nose pliers in place when you clamp them around the “X” crossbar in the drain.
- Grip the needle-nose pliers with your conventional pliers or wrench as low as possible. Use the pliers or wrench to slowly turn the locked needle-nose pliers counterclockwise.
- When the drain is loose enough, turn the needle-nose pliers by hand until you can pull the entire drain out.
When you’ve removed the entire drain, wash it thoroughly in a sink or bucket. Remove any hair trapped anywhere in the drain mechanism before you replace it. This is also a great opportunity to replace an old drain with a newer version. Bring the old drain with you to your hardware store to find an exact replacement.
Gross as it is, cleaning hair out of your drains is an important way to keep them working correctly. Luckily, it isn’t as time consuming, messy, or gross as you might think–especially if you follow these directions.

If you discover your clog wasn’t caused by hair after all, don’t worry: whatever’s going on down there, we can find it and fix. Just call the experts at Cass Plumbing of Tampa Bay, and we’ll clear any drain, any time, guaranteed. Call us for all your drain cleaning needs at 813-265-9200.
